Zone OCR, Barcode, QRCode module
Zone OCR allows you to capture areas (zones) of pages in a document. A zone can contain text, a table or a barcode (bar or matrix). The captured content is written to variables that can be used, for example, to create a metafile.
You can use variables in all input fields, see Variables.
The module can occur several times in the workflow.
No restrictive modules.
In the Zone Editor, you can mark the zones on sample pages and make all necessary settings for the zones. Proceed as follows.
To do this, first scan the sample pages individually which contain the areas to be marked. The file format of each page must be .jpg (JPEG). Select the scan settings for the original (such as color and resolution) to be used later for scanning the documents. If the file already exists, convert the file format to JPEG.
Then click the Drag Files Here Or Click To Upload button and select the document in the file browser (alternatively, you can drag and drop the desired file onto this button). If you have several pages, repeat this step for the other pages. The pages are displayed as thumbnails in the settings area on the right.
Image files for zone OCR are also stored in the WorkflowFiles directory. After changing the path, they must be copied into the new path or uploaded again via the web administration. However, the image is only used for visualization when configuring zone OCR – it is not required for the actual execution of a zone OCR process.
Once a page has been added, the setting dialogs for the zone definition become visible. The following can be defined:
- Zones for the first page
- Zones for all pages
- Zones for even pages
- Zones for odd pages
- Zones for the last page
This means it is possible to define on which pages of a multi-page document the zones are to be searched for and evaluated. The number of zones defined in each area is displayed after the zone name.
In the settings area, first select a page image from the drop-down list. The page image is displayed large on the left side after a short time.
Now click Add Zone. A rectangular marker is displayed on the page. Drag it over the area to be scanned with the mouse button held down. Change the size by dragging the small squares at the sides and corners. Don't make the zone too small, because not every document is scanned exactly the same way.
You can name each zone in the zone settings. The setting area appears automatically when the zone is added. You can delete a zone in the settings.
Zone names must be unique. Zones of the type Text must not overlap.
For each zone there is a separate settings area marked with the name of the zone.
The Delete Zone button allows you to remove a zone. All zone settings and the zone marking on the page image are removed.
The test function tests the zone in the text window which appears. The text that was recognized or read from a barcode appears there. All relevant settings for the text that has been read are taken into account (number of words or trimming spaces).
The name of the zone is displayed above the zone marking. The name is important for addressing the zone contents with variables (variables contain the zone name). For this reason, care should be taken when changing the name, as the variables (see Variables) might have been used for scan destinations in the metafile generation (see also The Scan Destination SMB Module). The name of the zone is displayed above the zone marking.
The name of the variable must not contain special characters. Allowed are small and capital letters (no umlauts or similar), numbers and the dot ".".
If the variable name is used in several places, all places can influence the variable value.
When changing the name of the zone, note that it will no longer be possible to resolve any variables used in metafiles.
For Type, specify what is contained in the zone. The following options are available.
The expected content is pure text. All text that has been recognized is written to the variable %OCRZONE.<Zone_name>%, e.g. %OCRZONE.Zone 1%. The text can also contain line breaks.
The content of the zone is interpreted as a table. A variable is created for each table column recognized (%OCRTABLE.<zone_name>.COL<column_no.>%, i.e. for column 1: %OCRTABLE.zone 1.COL1% or for column 5: %OCRTABLE.zone 1.COL5%). When output to a metafile, the line is repeated as many times as there are lines recognized in the table.
The whole table can also be output as a .CSV structure. To do this, use the variable %OCRZONE.<zone_name>% (for example, %OCRZONE.zone 1%). The values are enclosed in double quotation marks and separated by semicolons. Example:
"Date:"; "10/11/2017”;
“Username:"; "user54”;
"Folder:";"General";
Barcode 1D is a code that essentially consists of bars. The following types are supported.
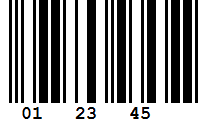
 The EAN-13 (European Article Number) code is used to identify products in order to be able to register them quickly at the cash register. The code is usually accompanied by the code content in plaintext.
See also https://en.wikipedia.org/wiki/International_Article_Number.
 The EAN-8 is a shortened version of EAN-13. This code is normally only used for articles that do not have enough space for the EAN-13 code (only issued on application). The code is usually accompanied by the code content in plaintext (like EAN-13).
See also https://en.wikipedia.org/wiki/International_Article_Number.
 Code 128 Auto allows display of the full ASCII character set. The three possible character sets are supported (A, B and C).
Code 128A: Uppercase letters and special characters
Code 128B: upper and lowercase letters
Code 128C: numerals
See also https://en.wikipedia.org/wiki/Code_128.
 Code-39 is an alphanumeric code with a rather low information density, but with a large character set.
See also https://en.wikipedia.org/wiki/Code_39.
 The ITF code is a derivative of code 25 interleaved (2 of 5 interleaved) and is often used to mark pallets or cartons whose products are marked with an EAN-13 code.
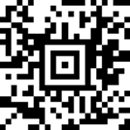
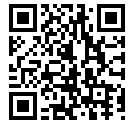 The QR code is a square 2D code. The markings in three corners of the matrix indicate the orientation. The code is particularly popular for reading by mobile phones.
See also https://en.wikipedia.org/wiki/QR_code.
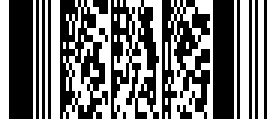 The PDF417 is a 2D code, which consists of stacked barcodes (stacked code). The characters used are encoded in words. A code word consists of 17 modules, each consisting of 4 bars and 4 gaps.
See also https://en.wikipedia.org/wiki/PDF417.
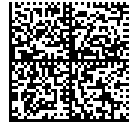 The data matrix code is one of the most well-known 2D codes. The size of the usually square code is determined from a large selection set.
The Aztec code is a 2D code characterized by a search element in the middle of the code.
See also https://de.wikipedia.org/wiki/Aztec-Code.
The contents of the zone that is read can be used to cause the scan to be terminated at this point. The decisive factor is the condition for the page separation (this setting is only displayed if page separation is active). B/W TIFF documents are compressed with CCITT Group 4.
Technically speaking, as soon as a separation is performed, a new instance of the workflow is started for each separated document. These instances then run across the separating zone OCR module and continue the workflow (another zone OCR module can follow here if necessary).
Do not separate: Page separation is not activated.
Separate and keep: The scan is separated at the pages where the zone content condition applies. The page with the separating zone is used as the first page of the new document.
Separate and remove: The scan is separated at the pages where the zone content condition applies. The page with the separation zone is removed from the scan.
Group by content: The separated sections with the same zone content will be merged into one file (in the order in which they were scanned). This means there will be as many files as there are different zone contents in the scanned batch.
If a page has multiple zones, enter the page separation information for one zone only. Entries in multiple zones can lead to an unexpected result.
Enter the condition here that is to trigger the page separation. You can use wildcards or regular expressions (not both at the same time).
Wildcards can be asterisks (*) for any number of unknown characters and question marks (?) for one unknown character.
Examples:
Invoice: The document is separated if the zone (exactly) contains the word invoice.
*Invoice*: Separation occurs when the word invoice appears somewhere in the zone text (the zone may contain more text).
*a?tiv*: Separation occurs when active or aktiv (which is German, or similar words like “activation” which correspond to the search filter) occur somewhere in the text.
Regular expressions allow a complex validity check of a character string. A regular expression always starts with ^ and ends with $.
Example:
^[0-9]{5}$: The string must be 5 characters and must only contain numbers.
Short overview of regular expressions: https://msdn.microsoft.com/library/az24scfc(v=vs.110).aspx
The content of a zone can be filtered using a regular expression. This means that not the complete content of a zone is transferred to the target variable, but only the result of the regular expression applied to the content.
Regular expressions can be used to implement very complex searches and filters. For example, the invoice number, invoice amount or IBAN can be read from an invoice. These values do not have to be in the same place in an invoice to do this. On an invoice, the invoice amount may be centered. On another it might be on the right. However, as long as the position can be found by a regular expression (e.g. because net always precedes it), the desired values are found and stored in the zone variable.
Example: Between the word net or amount and the word EUR or €, all number characters are found and output with two digits after a period or comma.
(?<=Net|Amount)(:)*([\s]*|(EUR|€))*(((\d*(,|.))*\d{2}))*
Since one cannot be one hundred percent sure that all values searched for in this way have been correctly recognized, the Document Review feature is very well suited for checking the values in the WebClient and correcting or supplementing them if necessary, see also Document review.
Removes spaces at the beginning and end of the recognized text in the OCR zone (visible in the zone preview).
Removes all spaces from the recognized text of the OCR zone within the zone content - including at the beginning and at the end (visible in the zone preview).
Converts the text of the OCR zone completely to lowercase (visible in the zone preview).
When recognizing barcodes, it may happen that a barcode is recognized but its type or content cannot be read immediately. This is usually because the code is slightly skewed on the surface. IQ4docs can then try to slightly rotate the area where the barcode was found, step by step, to enable recognition of the code.
Note that this option is computationally intensive and slows down detection. Enable the option only if codes are frequently not recognized.
To get a better result in the recognition of barcodes, the image can be inverted.
The inversion is done internally and is used purely for processing. The scan itself is then always output normally (i.e. not inverted). Try out which setting gives the best result for your scans.
- Auto: The system itself decides whether the processing is done with a normal or inverted image.
- Normal: The processing is done with a normal image.
- Inverse: The processing is done with an inverted image.
You can select the type of barcode recognition. Smart offers high detection speed and reliability. If problems occur with very high resolutions of the image file to be processed (very long processing time or incorrect recognition of codes), you can set the barcode recognition to Alternative and check whether this method provides better results with your scans.
Specify here how many words from the beginning of the recognized text should be used (e.g. 1 uses only the first word of the recognized text as zone text (visible in the zone preview).
The ImageService processes image data (e.g. from scans) and performs file format conversions, image optimization and the OCR function. It stores files in desired destination directories (depending on the module used, the rights of the user executing its application pool are used for this purpose). Its log file is Logs\ImageService.log.